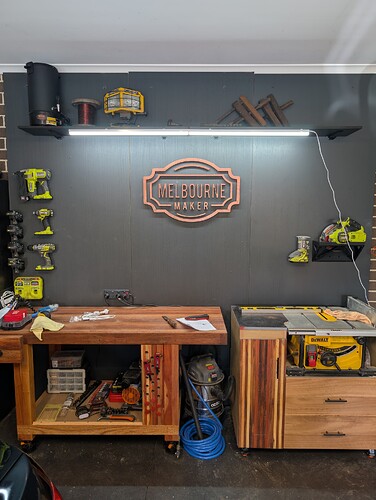
Just started in woodworking about 12 months ago. Mainly using pallet wood and recycled timber. This is the start of my garage workshop.
I actually watched your workbench video about two months ago. Gotta say was seriously impressed by your craftmanship, your presentation technique and your first rate safety boots.
Cheers! Yeh the safety thongs seem to upset a few people.
Nice work, BD! Love the logo on the wall. Real BDBD Energy
Link?
I wanna see this Thong Maker vid.
@Lifetime_ban beat me to it heh. On a side note do you sell your bee wax? I use it to make wood wax.
Not ATM. Mrs has reserved for making wax wraps and maybe some polish. See how we go although it might get scarcer. Ag dept is saying any combed that have been subject to chemical treatment must be landfilled (they don’t do this OS where tests don’t find concentrations above max safe levels - but they are being cautious. There are no upper limits for wax for organic acid treatments, but they are still saying combs treated need to be landfilled. While people baygon the kitchen floor and window sill. It’s nuts imo. Only untreated combs from honey will be able to be recovered - and mostly they will be re-used for future honey or for brood (so there’s not really an obvious path to making wax).
My advice - if you have a good source, stock up.
Interesting. Might buy a few extra then. Havnt had an issue previously. Cheers
Jeepers for a non woodworker you have a lot of toys. I have a rusty circle saw, a drop saw a planer and an orbital sander. And a couple cordless drills…
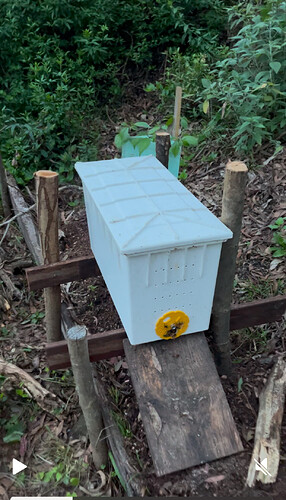
I recovered a swarm on the weekend and had to make a quick hive stand. Barely out of the Stone Age, but it works!
Should have explained - this is in anticipation of having to treat next year or if lucky the year after for varroa mites. The chems are basically insecticides. I want to stick to Oxalic and Formic acids which leave no residue (still no fun for the bees and slightly dangerous to use). There may be no shortage for a year or two. Depends on how long it takes to migrate from New South Pestilence.
Sensational @BomberDavid. I work at a large TAFE school that has all of the necessary tools, table saws, drop drills, thicknessers etc. Your work is as good as anything I have seen. Don’t doubt your age, we have a bloke who did the furniture course aged 70 and he was so good that we employed him.
Thanks mate. Yeh I’m slowly learning what works and what doesn’t. Been great for my mental health to have some time to myself and learning both woodworking and video editing.
I’ve been racking my brain coming up with a cost effective solution to flatten slabs, or in my case flatten Charcuterie Boards made up of half wood/half Epoxy.
Reckon i’ve watched at least 30 Router Sled videos.
Also seen a few whereby some very skillful Japanese woodworkers make a jig to use a hand planer for the same purpose.Seems finicky though, and outside my skillset.
Then i think…screw it, just go and purchase a cheap planer/thicknesser.
The Ozito is $400, or you could get a Dewalt with very little use off Facebook Marketplace for approx double that (3 of the same model for sale as of yesterday).
Now im back on the Router Sled.
Should be dead cheap to make as i only need to purchase 2 right angle metal strips.I require 1 metre long as i’m not doing tables, thus my projects are quite narrow.
I quite like this guy’s design.
He hasn’t used side rails like most people do, rather he has risers built into the metal sled.
I also like the woodchip extraction port built in…
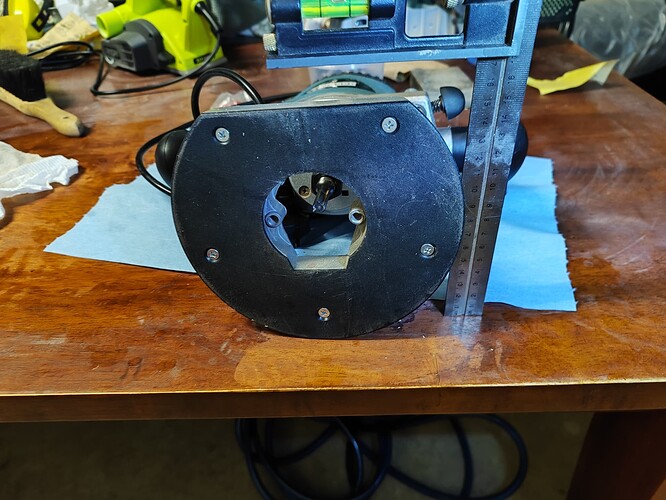
What router base are you using, @bltn
And how wide are your boards?
Not sure if this pic helps you ?
Its an old Wesco i picked up at Masters Home Improvement back when they were still in business.
My boards will be a maximum of 31cm wide at flattening stage.
Yes. You see lots of videos online of people putting together “router sleds for $20” and they use trimmers with small bases as the machine. I think if you are pushing around a router over timber like this, it pays to have a wider base for stability like this router you have.
I’ve made sleds that don’t require me to unscrew bases, but I’d encourage you to take the base plate off, use it as a template on some ply/perspex sheet to mount to your router onto that can run along your rails.
I’ve tried to solve the problem of dust collection with every sled I’ve built and I’ve concluded that you should just wear a mask and ventilate well.
Super underrated tip, but wax every moving part on your sled, and you’ll cut your time in half. Maybe more.
Edit: Regardless of the router bit you use, you’ll need to spend a fair bit of time sanding. Some bits are better than others at this, like spoilboard bits. Don’t take more than 1mm at a time, and maybe even start with less.
Yep.
Common practice seems to be Router Sled till flat and (close to) desired thickness is reached, then Belt Sanding at a combo or all of 60/80/100, then Orbital going up the grits.
Is the timber particularly warped? Could a belt sander just do the job on its own?
Belt Sander would get you there most of the time, but man its tedious taking off several mm’s with a Sander alone.
Timber that i source can be anywhere from 20mm right up to 40mm.
For example, the Blackwood slab i posted a few days ago is approx 37-38mm.
I’m picking up some Camphor Laurel Friday that is 40mm thick.
I doubt i’m going any higher than 32mm on the Epoxy pour as the stuff is fkn expensive, and that should be thick enough to cast small objects like dried fruit etc.
Therefore, i’m going to have some timber that needs to be sacrificed to the Woodworking Gods.
Think a Sled is better when we’re talking 4-5mm’s of material.


